Chinese Herbal Bone Broth: A Slow Cooker Recipe for Recovery
Bone broth has been a staple of Chinese medicine kitchens for longer than anyone thought to write it down. Not because it is trendy. Because bones cooked low and slow release something that food, in general, doesn't deliver easily: concentrated essence.
In Chinese medicine that essence has a name. Jing. It sits in the Kidney system and governs energy reserves, recovery speed, reproductive health, and how gracefully you age. You cannot manufacture Jing. You can only protect what you have and replenish it slowly through rest, sleep, and food that is dense enough to actually feed it. Bone broth is one of those foods.
This version adds a small handful of Chinese herbs available at any Asian grocer. Each one has a specific job. None of them are hard to find or expensive. Together with a slow cooker and eight hours of patience you don't actually have to be present for, they turn leftover bones into something your body will notice.
Two ways to make it. Slow cooker (the default) or oven (for those without one).
Quick answer
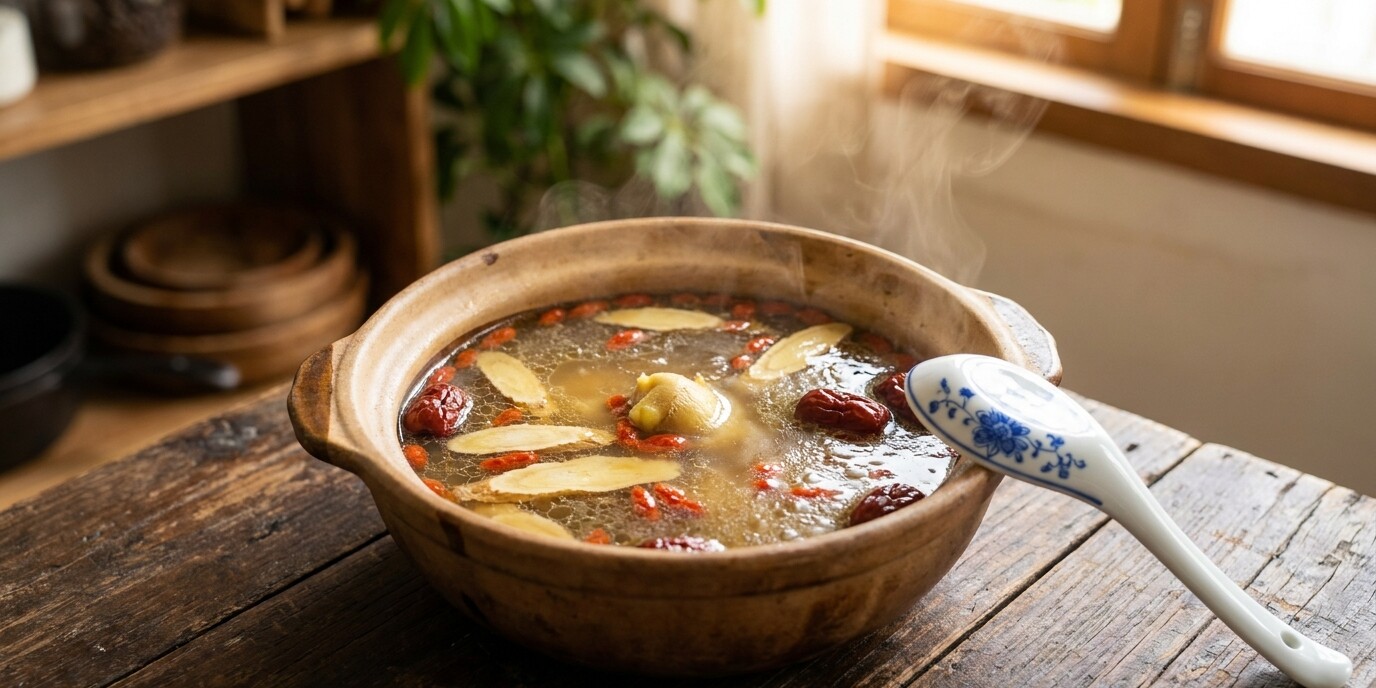
Chinese herbal bone broth is a long-simmered broth made from chicken or beef bones with a small selection of tonic herbs: astragalus (Huang Qi), red dates (Hong Zao), goji berries (Gou Qi Zi), and dried shiitake. Slow cook on low for 10 to 12 hours, strain, and drink as a warming tonic or use as a base for soups and congee. Traditionally used in Chinese medicine to nourish Qi and Blood, support Kidney essence (Jing), and aid recovery from fatigue, illness, or depletion. All herbs are available at Asian grocery stores.
When This Broth Is the Right Fit
This is a deep-nourishing recipe. The pattern it suits best:
- You are recovering from illness, a big surgery, childbirth, or a long period of depletion. The body is asking to rebuild from the bottom up. Bone broth and herbs are precisely for this.
- You are chronically tired. Not tired from a bad week. Tired in the bones. The kind that doesn't fully lift with rest. Low Kidney Qi or Jing.
- You are working too hard and not recovering well. Eating on the run, not sleeping enough, burning through reserves. This is the long-game recipe for that.
- You want a stock base that does more than add flavour. Use it as the liquid for congee, soups, or anything that calls for stock. You get medicine for free.
It is less suited if:
- You are running hot. Fever, inflammation, hot flushes, burning sensation, red face, thirst. This broth is warming and nourishing, not cooling. It can make heat patterns worse.
- You have a heavy, congested, damp presentation: thick phlegm, foggy head, heavy limbs, no appetite, bloating. Add aromatic herbs (ginger generously, dried tangerine peel) and reduce or skip the red dates temporarily.
If you are not sure what pattern you are in, the post on Spleen Qi Deficiency is a good starting point for understanding your energy pattern.
The Herbs: What They Do and Where to Get Them
These four herbs cover the core bases of Qi, Blood, and Essence nourishment. All are available dry at any Chinese or Asian grocery store, usually in the dried goods or tonic herb section. If your local grocery doesn't carry them, any Chinese herbal shop will. You can also order them online from Australian TCM suppliers.
Huang Qi (Astragalus Root)
Long, flat, pale yellow slices with a slightly sweet, grassy flavour. One of the most widely used tonic herbs in Chinese medicine. Tonifies Qi, supports the Wei Qi (defensive energy, roughly analogous to immune function), and helps the body extract nourishment from food more efficiently. In broth it adds a gentle sweetness and depth.
Huang Qi is sold in most Asian grocery stores in the dried goods section, usually near the red dates and wolfberries. Ask for "huang qi" or "astragalus slices". Avoid powdered forms for this recipe: the whole dried slices are what you want.
Hong Zao (Red Dates / Jujubes)
Wrinkled, dark red-brown dried fruit, sweet and soft when cooked. Tonifies Qi and Blood, calms the Shen (spirit), supports the Spleen, and has a harmonising quality that makes it compatible with almost every herb and most constitutions. It also adds a gentle natural sweetness to the broth that makes it more palatable to drink on its own.
Red dates (also called jujubes or Chinese red dates) are widely available at Asian grocery stores, health food stores, and increasingly in mainstream supermarkets. Get the dried whole variety, not the candied or fresh version.
Gou Qi Zi (Goji Berries / Wolfberries)
Bright red, chewy, mildly sweet dried berries. Nourishes Liver and Kidney Yin, supports Blood, and is particularly known for supporting the eyes and overall vitality. The broth turns slightly reddish-orange once they've cooked in. They become edible and can be eaten with the broth.
Goji berries are sold everywhere: supermarkets, health food stores, Asian grocers. For this recipe, the basic dried variety sold at the Asian grocer is identical to the premium packets at health food stores and costs a fraction of the price.
Dried Shiitake Mushrooms
These are not a TCM herb in the classical sense, but they belong here. They add significant Qi-nourishing depth, a rich umami base, and are clinically documented for immune-supportive properties. In Chinese medicine they are considered warming and nourishing to Qi. Soak them before adding and use the soaking water in the broth: it carries much of the flavour and nutrition.
Dried shiitake are available at any Asian grocer and most mainstream supermarkets.
Choose Your Variation
The base recipe above is a general Qi and Blood tonic suitable for most people. Once you have made it a few times, you can tune it to your specific TCM pattern by adding one of the four herb sets below. Each variation keeps the base herbs and adds or adjusts the extras.
Not sure which pattern you are in? The post on Spleen Qi Deficiency is a good starting point. Or book a consultation if you want to work it out properly.
Variation 1: Dampness
For: bloating, heaviness, foggy head, sluggish digestion, thick phlegm, fluid retention, feeling heavy and tired after eating.
Bone broth can feel too rich for a damp constitution on its own. This variation adds herbs that drain and move while the broth nourishes, making it more digestible and less cloying.
- Add Yi Yi Ren (Job's tears / coix seed), half a cup. The primary dampness-draining herb in food medicine. Mild flavour, widely available at Asian grocers in the grain section.
- Add Chen Pi (dried tangerine peel), one small piece. Moves Qi, transforms phlegm, stops the broth from sitting heavily in the stomach.
- Add Fu Ling (poria mushroom), a small handful of dried slices. Leaches dampness, calms Shen, very neutral flavour. Available at Chinese herbal shops.
- Reduce red dates to 3 or 4. They are too sweet and nourishing for heavy damp constitutions. A small amount is fine; a full serving can worsen dampness.
- Add extra ginger, use 8 to 10 slices. Ginger is warming and drying and helps counteract the moistening nature of the broth.
Where to source: Yi Yi Ren and Chen Pi at any Asian grocer. Fu Ling at a Chinese herbal shop.
Variation 2: Blood Deficiency
For: pale complexion, dizziness on standing, poor sleep, anxiety or a tendency to worry, light or scanty periods, dry hair or skin, numbness or tingling in the extremities.
The richest and most nourishing version of this broth. Bone broth already builds Blood; this variation adds the herbs that specifically fill the Blood vessels, calm the Heart, and support the Liver.
- Add Dang Gui (Chinese angelica root), 3 to 5 slices. The classic Blood tonic in Chinese medicine, slightly sweet and aromatic with a distinctive medicinal smell that softens during the long cook. Deeply nourishing to Blood, regulates menstruation, supports Liver Blood.
- Add Long Yan Rou (longan fruit, dried), 8 to 10 pieces. Nourishes Heart Blood, calms Shen. Good for people who are anxious or have troubled sleep alongside their fatigue. Available at Asian grocers.
- Add Bai Shao (white peony root), 3 to 5 slices. Nourishes Blood, softens Liver, relieves cramping. Particularly useful for Blood deficiency with muscle tension or period pain.
- Keep all the base herbs, especially the red dates. Increase them to 10 to 12 if you like: red dates are one of the best food-grade Blood tonics available.
Where to source: Long Yan Rou at any Asian grocer. Dang Gui and Bai Shao at a Chinese herbal shop. Ask by their Chinese names.
Variation 3: Kidney Yang Deficiency
For: feeling cold, especially in the lower back and knees; fatigue that is worse in cold weather; frequent clear urination; low libido; poor motivation or drive; slow recovery from illness.
The warmest and most fortifying version. Kidney Yang is the root of all warmth and drive in the body. When it is low, everything slows down. This variation adds herbs that stoke the Ming Men fire (the gate of vitality) while the broth nourishes the Kidney Jing that Yang depends on.
- Add Du Zhong (eucommia bark), 6 to 8 strips. Tonifies Kidney Yang, strengthens sinews and bones, specifically addresses lower back and knee weakness. One of the best-known herbs for bone and joint support.
- Add Rou Gui (cinnamon bark), one small piece, about 5 cm. Not cinnamon powder: the dried bark piece. Warms the Ming Men, circulates Yang Qi to the extremities. Use a small amount: too much and the broth becomes overpoweringly spicy.
- Add black beans, a small handful, rinsed. Not a TCM herb in the classical sense, but black-coloured foods have a traditional affinity with the Kidney system. They add body to the broth and a mild, earthy depth.
- Use extra ginger generously, Kidney Yang deficiency and cold patterns both respond well to warming aromatics.
Where to source: Black beans and cinnamon bark at the supermarket. Du Zhong at a Chinese herbal shop.
Variation 4: Kidney Yin Deficiency
For: feeling warm in the afternoon or evening, night sweats, dry mouth or throat at night, restless sleep, low back ache that feels deep and achy rather than cold, tinnitus, feeling wired but tired, dryness (skin, eyes, hair).
The opposite of Variation 3. Where Yang deficiency is cold and slow, Yin deficiency is warm and restless. The body is overheating because it has run out of the cooling, moistening substance that keeps Yang in check. This broth is gentler, cooler, and more moistening than the base recipe.
- Add Shu Di Huang (prepared rehmannia), 3 to 5 slices. The primary Kidney Yin tonic in Chinese medicine. Sweet, dark, deeply nourishing to Yin, Blood, and Essence. Gives the broth a deep, slightly sweet flavour.
- Add Bai He (lily bulb, dried), a small handful. Nourishes Lung and Heart Yin, calms Shen, particularly useful when there is restlessness, anxiety, or a dry cough alongside the fatigue.
- Keep the goji berries (already in the base). They nourish Liver and Kidney Yin directly.
- Reduce or remove the ginger. Ginger is warming and drying. Yin deficiency patterns already run warm and dry: adding more heat makes it worse. One or two slices is enough for flavour.
- Remove cinnamon and any warming spices. The same reason: warming herbs aggravate Yin deficiency.
Where to source: Bai He (dried lily bulb) at most Asian grocers in the dried goods section. Shu Di Huang at a Chinese herbal shop.
How to Make It
Servings: Approximately 1.5 to 2 litres of broth
Prep: 20 minutes (including blanching the bones)
Cook: 10 to 12 hours on low (slow cooker) or 3 to 4 hours (oven)
Tools: Slow cooker or large lidded oven-safe pot or Dutch oven

Ingredients
Bones:
- 1 to 1.5 kg chicken carcasses, backs, or wings (or beef marrow bones, or a mix)
- 2 tablespoons apple cider vinegar or white vinegar (draws minerals from the bones)
Aromatics:
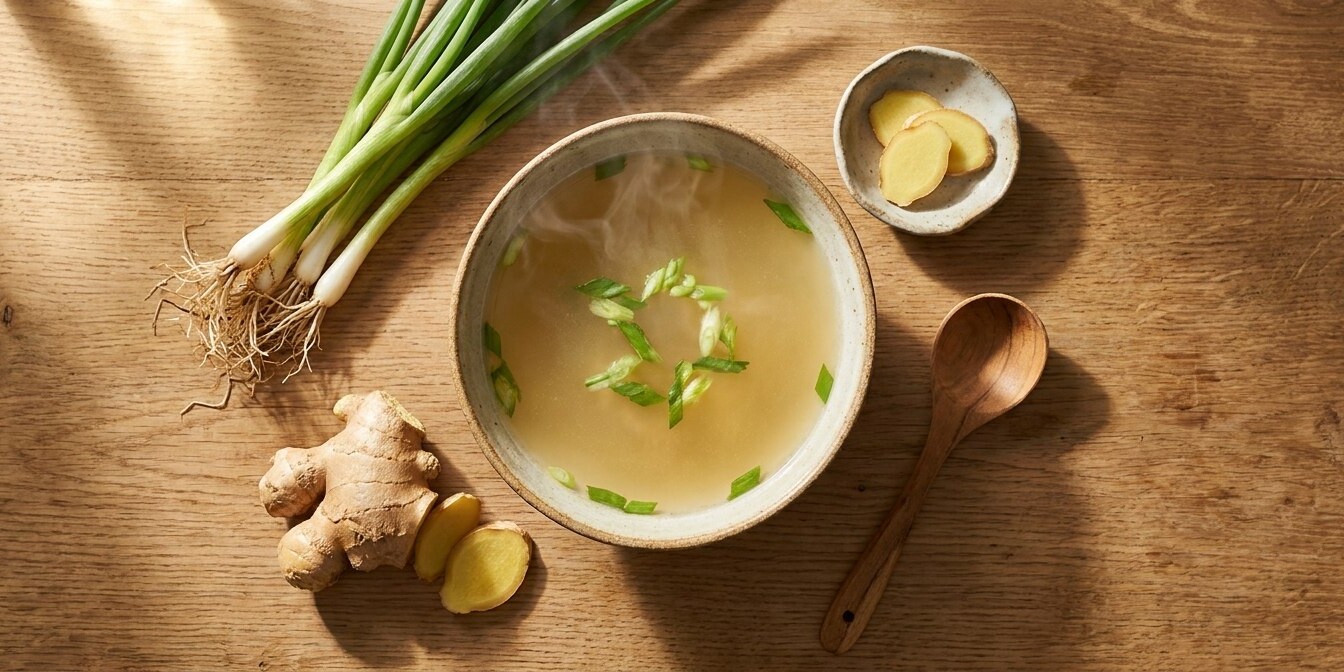
- 5 cm fresh ginger, sliced (no need to peel)
- 4 to 5 garlic cloves, smashed (optional)
- 2 spring onions, roughly chopped
Herbs:
- 6 to 8 slices Huang Qi (astragalus root)
- 6 to 8 Hong Zao (red dates), pitted or whole
- 2 tablespoons Gou Qi Zi (goji berries)
- 4 to 6 dried shiitake mushrooms, soaked 20 minutes, soaking water reserved
Liquid:
- Cold water to cover (approximately 2 to 2.5 litres)
- The shiitake soaking water (add to the pot)
To finish:
- Salt to taste (add after straining, not during the cook)
Optional herbs (add any or all):
- 1 stick Dang Shen (codonopsis), about 10 cm
- 6 to 8 Long Yan Rou (longan fruit)
- 1 small piece Chen Pi (dried tangerine peel)
Step 0: Blanch the Bones (Don't Skip)
This is the step that separates a clear, clean broth from a grey cloudy one. Put the bones in a large pot, cover with cold water, and bring to a boil. Boil for 5 minutes. You will see grey foam and impurities rise to the surface. Drain, rinse the bones under cold water, and rinse the pot. This takes 10 minutes and makes a significant difference to the final broth.
Method 1: Slow Cooker (Recommended)
1. Load the slow cooker. Add the blanched, rinsed bones. Add the ginger, garlic (if using), spring onion, all the herbs, and the soaked shiitake mushrooms plus their soaking water.
2. Cover with cold water. Fill to about 2 cm below the rim. Add the vinegar.
3. Cook on LOW for 10 to 12 hours. Overnight works well. If you have a keep-warm function it will hold safely after the cook is done.
4. Strain. Pour the broth through a fine-mesh sieve into a large bowl or pot. Discard the bones and spent herbs (the goji berries and longan, if used, can be eaten).
5. Season after straining. Salt to taste. Do not salt during the cook: it concentrates and can become too salty as the liquid reduces.
6. Cool and store. Let the broth cool, then refrigerate. Fat will solidify on top overnight: skim it off or stir it back in depending on your preference.
Method 2: Oven (If You Don't Have a Slow Cooker)
1. Preheat the oven to 120 degrees Celsius (fan-forced) or 140 degrees conventional.
2. Load a large Dutch oven or oven-safe stockpot. Same ingredients as above.
3. Bring to a simmer on the stovetop first, then transfer to the oven with the lid on.
4. Cook for 3 to 4 hours. Check at 3 hours: the broth should be golden, fragrant, and slightly reduced. If using chicken bones, 3 hours is usually enough. Beef bones benefit from a full 4 hours.
5. Strain, season, store as above.
The oven method produces a slightly richer, more gelatinous broth because the heat is more even than a slow cooker. It is less hands-off (you need to preheat and monitor the liquid level) but the result is excellent.
How to Use It
Drink it straight as a warm tonic: a mug in the morning or last thing at night. Season with a pinch of salt and a few drops of sesame oil if you like.
Use it as the liquid for congee (see the leftover roast chicken congee recipe for how). The combination of herbal broth and soaked jasmine rice is about as close to a complete Spleen and Kidney tonic as food gets.
Use it as a base for soups, noodles, or anywhere stock is called for. The medicine travels with the broth.
Make It Easier and Faster
No time to blanch the bones? Skip it. The broth will be slightly cloudier but completely safe and still nutritious. Skim the foam during the first hour of cooking instead.
No fresh ginger? A teaspoon of ground ginger works. Less nuanced but the job gets done.
Can't find all four herbs? Use what you can get. Astragalus and red dates are the most important. Goji berries and shiitake are the easiest to find anywhere. You don't need all four.
Make it in an Instant Pot: Pressure cook on high for 3 hours with natural release. The broth will be rich and well-extracted. The herbs don't need as long under pressure. This is the fastest method.
Make a large batch and freeze: Double or triple the recipe. Freeze in 500 ml portions in zip-lock bags or containers. Stack flat in the freezer. Pull out and defrost overnight in the fridge or in a pot on the stove when you need it. This is the real sick-day insurance: you freeze it when you are well and have it ready when you are not.
Storage and Reheating
- Fridge: 5 days in a sealed container.
- Freezer: 3 months. Freeze in portions before adding salt (easier to adjust when reheating).
- Reheat: Gently on the stove or in the microwave. Do not boil vigorously: a gentle warm is enough.
- The fat layer: Refrigerated broth develops a solidified fat layer on top. This is natural. Skim it off for a cleaner broth or stir it back in for a richer one. Personal preference.
How Often to Have It
As a tonic drink: one cup a day is a reasonable starting point. More during recovery from illness or a depleted period.
As a cooking base: use it freely.
This is food, not a prescription. There is no upper limit for a constitution that runs cool, tired, or dry. For hot or damp constitutions, moderate and add Chen Pi (dried tangerine peel) to make it more digestible.
Frequently Asked Questions
Can I use beef bones instead of chicken?
Yes, and beef marrow bones make an even richer, more gelatinous broth. The TCM character is similar: warming, nourishing, Kidney-supportive. Beef bones benefit from roasting first (30 minutes at 200 degrees in the oven) for deeper colour and flavour. Increase the slow cooker time to 12 to 18 hours for beef.
Do I need to use all four herbs?
No. Astragalus and red dates are the most important. Goji berries are an easy addition available everywhere. Shiitake adds flavour and depth. If you can only find one or two, use them. The broth is still nourishing without the full set.
Is this safe during pregnancy?
The herbs in this recipe, at these quantities, are generally considered safe for pregnancy. Red dates, goji, and shiitake are food-grade. Astragalus (Huang Qi) is commonly used in Chinese medicine during pregnancy for Qi support. That said, every pregnancy is different. Check with your practitioner before adding herbal quantities beyond food amounts, especially in the first trimester.
Can I give this to children?
Yes. The broth itself is nutritious and gentle. Reduce or omit astragalus for children under 5 (not harmful, just unnecessary at food-quantity doses). Red dates, goji, and shiitake are suitable for all ages.
The broth didn't gel. Did I do something wrong?
A gelled broth (like jelly when cold) means high collagen extraction. Chicken feet and joints produce the most gel. Carcasses and backs produce less. If your broth doesn't gel, it is still nutritious: it simply has less collagen. Adding a chicken foot or two (available at most Asian butchers) is the easiest fix for a thicker, more gelatinous result.
When to Get Some Help
Bone broth is food. It is not a substitute for medical care.
If your fatigue is severe, has lasted more than a few weeks, or comes with other symptoms (weight loss, night sweats, unexplained pain, changes in appetite or digestion), see your GP first. There are medical causes of depletion that need investigation before you start a recovery programme.
If your fatigue is ongoing and you have ruled out medical causes, a consultation will help work out what pattern is driving it and what food and lifestyle changes will actually move the needle for your specific situation. Book a time here if you would like some direction.
And if you want to understand the deeper framework behind this style of eating, including why Jing matters and what other foods protect it, that is exactly what the book is about. Before the Needles is the long version of everything on this blog. Sign up for early access and you will get a free chapter when it is ready.
Easy Leftover Roast Chicken Congee: Three Ways to Make It
Four ingredients. One pot. One of the oldest recovery foods in Chinese medicine.
Congee has been prescribed by practitioners for a few thousand years because a depleted digestion system can handle it on its worst day. Warm, silky, easy to absorb. It turns leftover chicken into something your body actually wants.
Three ways to make it. Classic stovetop, rice cooker, or Instant Pot.
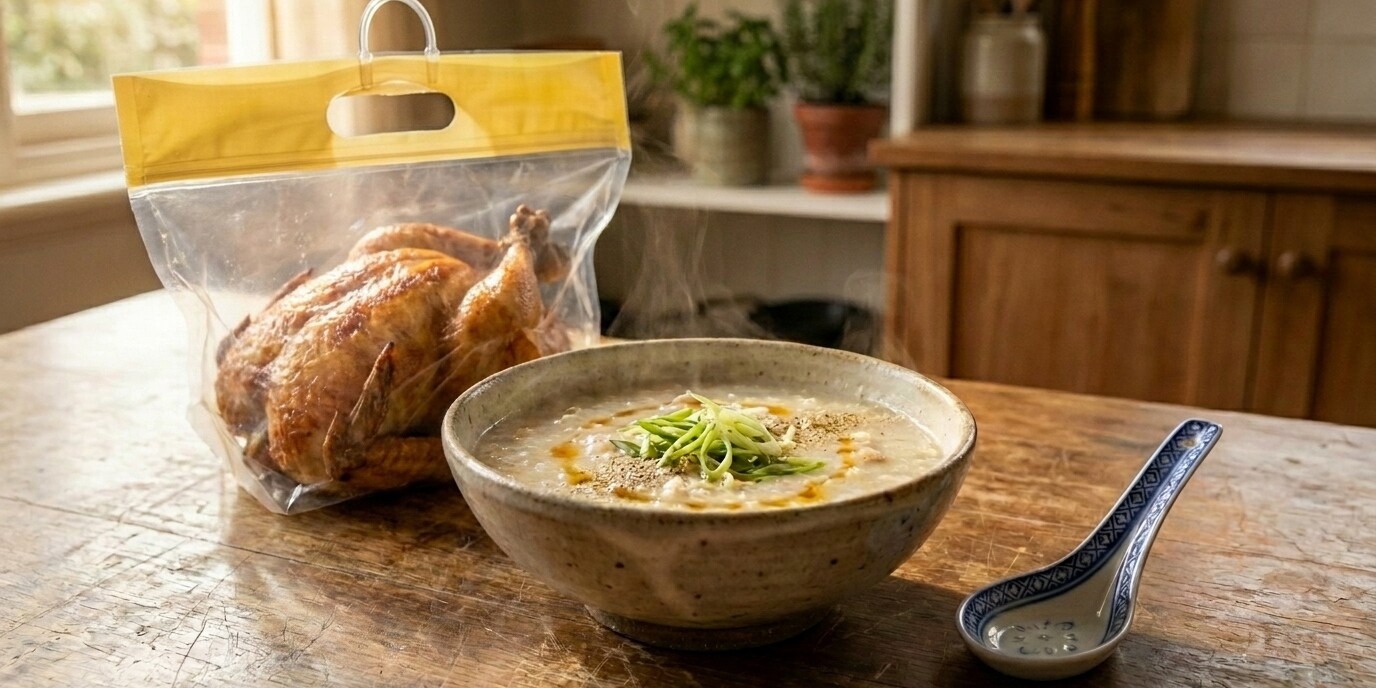
One Australian note: the supermarket rotisserie chicken, carried home swinging from its little plastic bag like you've got your life together, is known as the "bachelor's handbag". Pull the meat off, throw the carcass in the pot. Time poor mothers can pretend they are back to their bachelorette lifestyle where they had a bit more time by picking up a pre-cooked chook.
Quick answer
Easy leftover roast chicken congee is a Chinese rice porridge made by soaking jasmine rice first (overnight or a 30-minute hot-water soak), then simmering with the bones from a leftover roast chicken, a thumb of ginger, and stock or water. Stovetop uses a 1:8 rice-to-liquid ratio over 60 to 75 minutes with occasional stirring. Rice cooker uses a 1:6 ratio on the porridge setting, hands-off for an hour. Stir in shredded chicken at the end, season with salt, top with scallion, sesame oil, white pepper, and soy. Traditionally used in Chinese medicine to nourish digestion, support recovery, and warm the Middle.
When This Bowl Is the Right Fit
Congee is a soft-medicine food. The pattern it suits best:
- You're tired, run down, or recovering from something. Mild illness, a long week, broken sleep. Spleen Qi is low and your digestion is asking for less, not more.
- You don't have an appetite but you should eat. Congee feels like food but goes down like water. Easier to finish than a heavier meal.
- It's cold outside and you want something warm to hold. Especially first thing in the morning or late at night.
- You've got leftover roast chicken sitting in the fridge asking what's next.
It's less suited if:
- You're dealing with thick, congested, damp symptoms (heavy chest, productive cough, sluggish digestion with bloating after meals). In that case, congee on its own is too rich and moistening. Add aromatic warming spices (white pepper, ginger generously, a small piece of dried tangerine peel) to drain rather than build.
- You feel hot or wired and need to cool down. Congee is gently warming. Save it for the cooler day.
If you're not sure what pattern you're in, the post on Spleen Qi Deficiency will help you read your own body.
Choose Your Method
The recipe below is stovetop, which works in any kitchen with no special equipment. If you own a rice cooker, Instant Pot, or slow cooker, there's a quick callout after the main recipe showing how to adapt it in about three lines each.
A proper slow-simmered Sunday version with TCM herbs (red dates, goji berries, dried scallop, dried shiitake) is on the way as a separate post. That one's the weekend project. This one is the weeknight rescue.
What's In the Bowl
Rice
Jasmine rice is the classic for this recipe. It's fragrant, long-grain, and breaks down into a clean, silky texture. If you can get freshly harvested rice in September, use it. New-season rice has more moisture and natural fragrance than rice that's been sitting in a warehouse for six months, and the difference in the bowl is noticeable.
Brown, red, and purple rice all work with this recipe too. They stay chewier and won't get quite as silky, but the soaking and rinsing technique is just as useful for them. Add an extra cup of water and expect another 20 to 30 minutes of cook time.
The ratio matters, and it differs by method. Stovetop congee loses water through evaporation over the long simmer, so you start with more liquid. Rice cookers are sealed, so almost no water is lost. Use too much liquid in a rice cooker and you get soup, not congee.
- Stovetop: 1 cup rice to 8 cups water
- Rice cooker: 1 cup rice to 6 cups water
These ratios assume you've soaked the rice first (see below). If you skip the soak, add an extra cup of liquid to each.
The Soaking and Rinsing Step (Don't Skip This)
This is the step most recipes either skip or underdo, and it's the one that separates silky congee from gluey congee. To understand why it matters, it helps to know what's actually inside a rice grain.
The anatomy of a rice grain
A grain of polished white rice has three main layers. On the outside is the endosperm starch coating. In the middle is the germ (or embryo). At the centre is the inner kernel starch.
The outside layer, the endosperm starch, is incredibly sticky. It's so sticky that historians believe it was used as mortar to bind sections of the Great Wall of China together. It also shows up as an active ingredient in K-beauty rice face masks, because it's a natural cleanser. Useful stuff. But not what you want in your congee.
The fragrant part of rice is the germ layer sitting just inside that outer coating. When it gets cooked down slowly in water, it blooms. The grain opens up and releases its starch into the liquid gradually, which is what creates that silky, smooth congee texture. That blooming germ is also the most flavourful part of the grain. It's why properly made congee, cooked from well-rinsed rice, has a natural fragrance and sweetness that doesn't need much seasoning.
Soaking and rinsing strips off the exterior endosperm starch and exposes the germ layer underneath. The more outer starch you remove, the more fragrant and smooth the congee will be.
How to soak: Pour hot water over the rice and leave it until every grain has sunk to the bottom of the bowl. That sinking is your visual cue. It means the grains have absorbed enough water and are ready. Once they're all down, drain.
How to rinse: Rinse the soaked rice 4 to 6 times under cold tap water, swirling and draining each time, until the water runs completely clear. The cloudiness is surface starch leaving. Keep going until the water is genuinely clear, not just less cloudy.
Start with cold tap water in the pot. Add cold tap water as your cooking liquid, not stock, not hot water. Clean rice cooked in clean cold water has its own fragrance. Get the rinsing right and you barely need any seasoning beyond salt. The bones and ginger do the rest of the work.
This technique works across all rice types: jasmine, short-grain, brown, red, purple. The soaking and rinsing process is the same regardless of which rice you use. Coloured rices won't get quite as silky, but they'll be significantly better soaked than unsoaked.
This is also why the ratio differs from most recipes. Soaked, well-rinsed rice breaks down faster and needs less liquid.
The shiitake upgrade (optional): Soak a few dried shiitake mushrooms in cold water at the same time you soak your rice. When it's time to cook, use the shiitake soaking water as your liquid and slice the rehydrated mushrooms into the pot. The soaking water carries a deep earthy flavour that lifts the whole bowl. Season with salt only, not soy sauce in the pot. See the note below on why.
A note on soy sauce: Soy sauce goes at the table, not in the pot. Cooking soy sauce directly into rice makes it taste bitter. Even with claypot rice, the soy goes on after the rice is cooked. Same principle here. Put the soy on the table with the toppings and let people season their own bowls.
Roast Chicken (and the bones, if you've got them)
Yesterday's roast chicken is the secret, whether it came out of your oven or off the rotisserie at Woolies. You've already done the hard work, or someone else has, so this recipe is mostly about extracting the rest of the flavour and folding the meat back in.
The bones, if you still have them, will throw off depth and richness in the cooker. Toss them in whole, with the skin attached. The cooked meat goes in shredded at the end so it stays tender.
No bones? No problem. Use a good chicken stock from a carton and just stir the shredded chicken meat in at the end. Lighter result, still excellent.
Ginger
A 3 to 5 centimetre piece, peeled and smashed with the side of a knife (or roughly sliced). Ginger is warming, dispels cold, supports digestion, and softens any greasy quality in the leftover chicken. Most congee recipes underdose it. Be generous. You can fish out the big pieces before serving.
Salt and toppings
Salt the congee modestly during cooking. If you've soaked and rinsed the rice properly and started with cold water, you'll find the congee has its own clean fragrance and doesn't need much.
Soy sauce always goes at the table, not in the pot. Cooking soy sauce directly into rice makes it taste bitter, even with claypot rice, the soy goes on after. Let people season their own bowls.
A traditional table-side spread:
- Sliced scallion (greens, raw)
- A small drizzle of sesame oil
- A generous pinch of ground white pepper
- Light soy sauce
- Fried shallots or fried garlic
- Chilli oil if you want some heat
You don't need all of these. Scallion, white pepper, and a few drops of sesame oil is a complete bowl.

Ingredients
- 1 cup jasmine rice, soaked and rinsed (see the soaking and rinsing step above)
- 8 cups cold tap water (the bones and chicken carry enough flavour; stock is optional and adds richness but isn't necessary)
- The bones from a roast chicken (optional but excellent)
- The leftover meat from the same chicken, shredded (about 2 to 3 cups)
- 4 to 5 cm fresh ginger, peeled and smashed or sliced
- 1 teaspoon salt, to taste
Toppings (pick what you like):
- Sliced scallion (greens)
- Sesame oil
- Ground white pepper
- Light soy sauce
- Fried shallots
- Chilli oil
Method: Stovetop (The Classic)
Servings: 4
Active time: 15 minutes (occasional stirring)
Total time: 60 to 75 minutes
Tools: Large heavy-based pot with a lid, wooden spoon
1. Soak and rinse the rice. Pour hot water over the rice and wait until all grains have sunk. Drain, then rinse 4 to 6 times in cold water until it runs completely clear. This is the step that gives congee its silky texture and natural fragrance.
2. Combine in the pot. Tip the soaked, rinsed rice into a large heavy-based pot. Add 8 cups of cold tap water (or stock if you prefer), the bones (if using), and the ginger. Bring to a boil over medium-high heat.
3. Drop to a simmer. Once boiling, lower to a gentle simmer. Lid stays on but slightly cracked so steam can escape. Set a timer for 60 minutes.
4. Stir occasionally. Every 15 minutes or so, stir from the bottom to stop the rice sticking. If it's getting too thick, add half a cup of hot water. If still too thin after 60 minutes, lid off for the final 10 minutes.
5. Fish out the bones and ginger. When the rice has broken down and the liquid is silky and creamy, remove the bones and ginger pieces.
6. Stir in the chicken. Add the shredded chicken meat and stir through. The residual heat warms it gently without overcooking.
7. Taste and salt. Probably 1 teaspoon, sometimes more depending on whether your stock was already salted.
8. Serve. Ladle into bowls. Top with whatever you like. Eat slowly while it's hot.
Using a Different Appliance?
Got a rice cooker?
Same ingredients, but use 6 cups of water instead of 8 (rice cookers are sealed, so almost no water evaporates). Soak the rice first as above. Load the bowl, select "Porridge" or "Congee", press start. Come back in 60 to 90 minutes. Fish out bones and ginger, stir in shredded chicken, season and serve.
No porridge setting? Don't worry. Just hit the regular cook button twice. Run a standard white rice cycle, then when it's done, hit cook again with a small splash more water. This is the student version and it works fine on even the most basic rice cookers.
Got an Instant Pot or pressure cooker?
Same ingredients. High pressure for 30 minutes, natural release for 10 minutes. Fish out bones, stir in chicken, season and serve. Total time about 45 minutes. One tip: stir before sealing the lid so the rice doesn't settle on the base and trigger the burn sensor.
Got a slow cooker?
Same ingredients in the pot before bed. Low for 6 to 8 hours. Wake up, fish out bones, stir in shredded chicken, salt to taste. The overnight simmer pulls the most depth from the bones of any method. Great for sick-day breakfast prep.
Make Ahead, Store, and Reheat
This dish is better on day two. The flavours settle, the rice softens further, and it's ready in minutes when you're feeling rough or rushing out the door. Make a batch on Sunday and you've got medicine-grade lunches for the week.
How long it keeps
- Fridge: 4 days in a covered glass container or jar. Cool to room temperature within 2 hours of cooking, then straight into the fridge.
- Freezer: 2 months in zip bags or freezer-safe containers. Portion before freezing (1 to 2 cups per container) so you can defrost what you need.
What happens overnight
The rice keeps drinking the liquid in the fridge. By morning it'll be thicker, almost set, like cold porridge. This is normal. Add a splash of hot water or stock (start with 1/4 cup per bowl) when you reheat and stir until it loosens back to congee texture. Some people prefer the thicker version straight out of the fridge. Both are correct.
Reheating on the stove
The gentlest method. Tip the congee into a small saucepan with a splash of water or stock. Warm on low to medium heat, stirring every minute or two, until it's hot through and silky again. Takes 5 to 7 minutes. Add toppings fresh.
Reheating in the microwave
Works well, especially at the office. Transfer to a microwave-safe bowl, add a splash of water, cover loosely (a plate works), and heat in 60-second bursts, stirring between each. Usually 2 to 3 minutes total. The stirring stops the centre being lava-hot while the edges are cold.
Reheating in a rice cooker
If you have a rice cooker, you can use it to reheat too. Add the congee back in with a splash of water, hit the "keep warm" or "reheat" function for 15 to 20 minutes, stir, serve.
Take it to work in a Thermos
This is the trick that makes congee a real weekday meal:
1. Pre-warm your Thermos by filling it with boiling water for 5 minutes, then tip the water out.
2. Reheat your congee on the stove or microwave until it's piping hot (not just warm).
3. Add a splash of extra liquid so it's slightly looser than you want to eat it. It'll thicken in the flask.
4. Pour straight into the warmed flask, seal tight.
5. Pack your toppings (scallion, sesame oil, soy, white pepper) in a small container or zip bag.
A good vacuum flask (Stanley, Zojirushi, Thermos brand) will keep congee hot from 7am to 1pm without trouble. Stir the toppings through when you open it at the desk.
Freezing and defrosting
Freeze in portions. To defrost: overnight in the fridge, then reheat as above. Or straight from frozen into a saucepan on low with a generous splash of water, stirring until it breaks up and warms through (10 to 15 minutes). The texture is slightly less silky than fresh but completely good.
Sick-day shortcut
If you're already unwell, the best move is to cook a big batch on a well day and freeze it in 1-cup portions. When the flu hits, you reach into the freezer instead of standing over a pot. Future-you will thank past-you.
How Often to Have It
There's no upper limit for most people. Congee is a daily breakfast food across much of China. For someone recovering from illness, fatigue, or low appetite, it can be the main meal for several days in a row.
For kids: dilute the congee a bit and skip the strong toppings (no chilli oil, light on the soy). Add cooked vegetables for variety.
For pregnancy: completely safe and often gentle on a queasy stomach.
Where to Buy the Ingredients
All standard supermarket or Asian grocer items. Jasmine rice, chicken stock, ginger, scallion, sesame oil, soy sauce, white pepper, fried shallots. Pickled mustard greens (zha cai) are a classic Cantonese topping if you can find them at the Asian grocer.
Frequently Asked Questions
Which method gives the best result?
Honestly, all four are close. Stovetop has the most cook-control and arguably the silkiest texture if you stir it well. The slow cooker gives the deepest broth flavour because of the long bone simmer. The rice cooker is the most foolproof. The Instant Pot is the fastest. Pick the one that fits your day.
Can I make this with raw chicken instead of leftover roast?
Yes. Add a whole chicken or chicken pieces (with bones in) at the start with the rice and water. Cook as per your chosen method. Pull the chicken out at the end, shred the meat, discard the bones, and return the meat to the pot. The flavour is different (more pure chicken, less depth from roasting) but excellent.
Can I use brown rice or another grain?
Brown rice works but stays chewier and won't get as silky. Add 2 to 3 extra cups of liquid and expect another 30 to 45 minutes. Millet is even more cooling and easier on digestion, oats are warming, barley drains dampness. None are technically congee, but each has its own TCM character.
Can my kid eat this?
Yes. Use less salt, skip the chilli oil and white pepper for younger kids, and dilute with a bit of water if it's too thick. Add cooked carrot, peas, or shredded leafy greens for variety. It's one of the gentlest cooked dishes you can give a child.
What if congee leaves me feeling heavy or bloated?
You might be in a damp pattern. Two ways to adjust: (1) use less rice and more liquid for a thinner bowl, (2) add more aromatic warming ingredients (extra ginger, white pepper, a small piece of dried tangerine peel called chen pi in the simmer). Or skip congee for a few days and try a clear soup with vegetables instead.
When to Get Some Help
Congee is food, not medicine, and it's safe for almost everyone. The exception: if you've had a sudden drop in appetite, persistent digestive symptoms for more than a few weeks, unexplained weight loss, or fatigue that doesn't lift with rest and good food, see your GP first. Food can support recovery but it can't sort out a problem that needs proper investigation.
If you'd like help working out what your body is asking for, including whether congee is the right fit for your pattern, book a consultation and we'll sort it out together.
If you're keen on more food-as-medicine recipes and a deeper look at how Chinese medicine actually works, I'm writing a book called Before the Needles. Sign up for early access and you'll get a free chapter when it's ready.
Chuan Bei Mu Steamed Pear: An Old Chinese Remedy for a Dry, Lingering Cough
When a cough hangs around after the cold is gone. You're not sick anymore, but your chest still feels dry and tickly, especially at night. The lungs are asking for moisture, not more medicine.
This is the kind of cough Chinese medicine has been treating for centuries with three ingredients, a steamer, and an hour of patience. The recipe is called Chuan Bei Mu steamed pear (川贝雪梨), and it's a household remedy across China for the dry, persistent, post-viral cough that sits in the throat and won't quite leave.
It's also gentle enough for kids, which is partly why it survived.
Quick answer
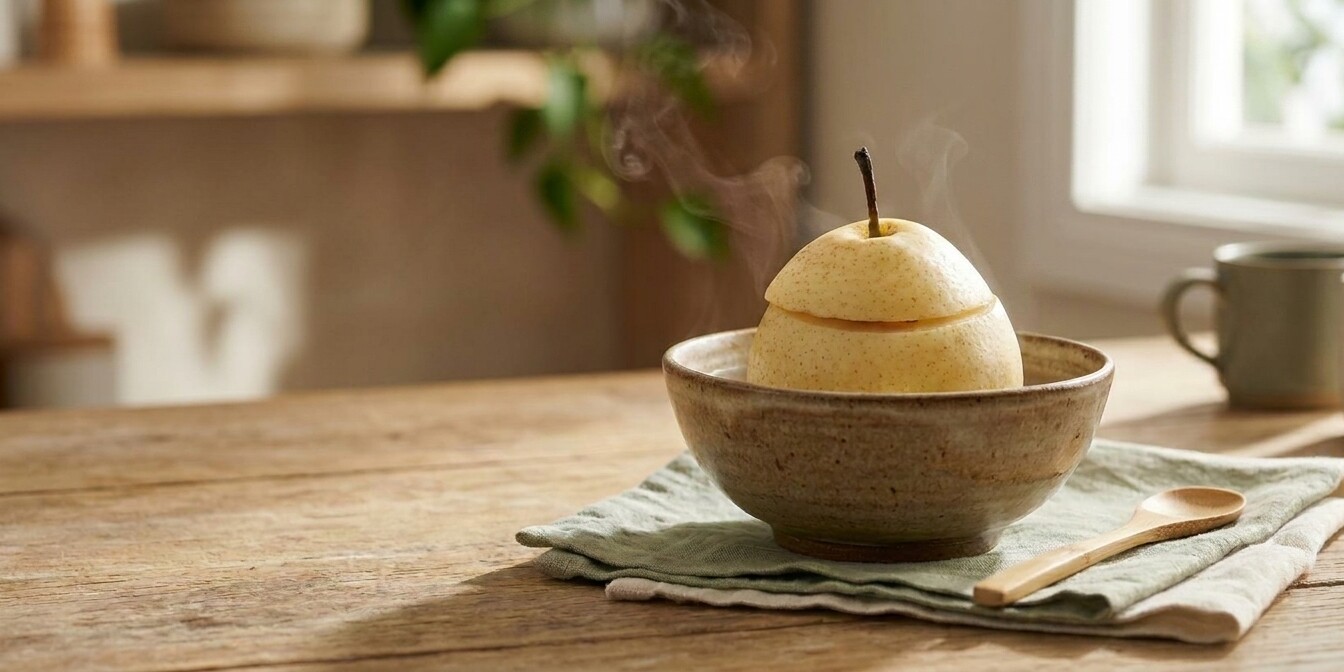
Chuan Bei Mu steamed pear is a traditional Chinese home remedy for dry, lingering coughs. You hollow out a Chinese snow pear, fill it with 12 to 18 Chuan Bei Mu bulbs (around 3 to 5 grams, about 2 teaspoons ground) and 20 grams of rock sugar, steam it for 50 minutes, and eat it warm. In Chinese medicine, all three ingredients moisten the lungs and calm the kind of dry, irritated cough that lingers after a cold. Most people feel relief within one to three servings.
When This Remedy Is the Right Fit
Not every cough is the same. This one works best for the dry, hot, scratchy kind: the cough that lingers after a cold or flu, the kind that wakes you up at 3am with no phlegm coming up, the cough that feels worse in dry air or after talking for too long.
If your cough is wet, productive, and bringing up a lot of clear or white phlegm, this isn't your remedy. That's a damp-cold pattern and the snow pear (which is cooling and moistening) can make it worse. For a wet cough, ginger and warm soup are closer to the mark.
A useful rule of thumb:
- Dry cough, hot or scratchy throat, worse at night → Chuan Bei Mu steamed pear is for you
- Wet cough, lots of phlegm, feels cold → skip this one
- Cough that came on with a cold and is still going 2 to 3 weeks later, mostly dry → this is the classic case
If you're not sure which pattern you have, you can read more about Chinese medicine patterns, or just trust your throat. A dry, irritated throat wants this. A wet, gunky throat doesn't.
What's In the Bowl
Chuan Bei Mu (川贝母)
The herb that does most of the work. Chuan Bei Mu is the dried bulb of a small lily that grows high in the mountains of Sichuan in western China, harvested in spring. The full botanical name is Fritillaria cirrhosa, and you'll sometimes see it sold as "Sichuan fritillaria" in English-speaking herbal shops. It's slightly bitter, slightly sweet, and cooling in nature.
In Chinese medicine, Chuan Bei Mu is used to moisten the lungs, transform stubborn dry phlegm, and calm a chronic dry cough. It's the herb you reach for when the cough is hot, dry, and unproductive, especially when other approaches haven't shifted it.
You can use the bulbs whole or grind them into powder. I usually grind them. Whole bulbs end up on the bottom of the bowl and most people don't eat them. Powdered, they dissolve into the pear juice and you actually take the herb you came for.
A quick note on naming. There are several Fritillaria species used in Chinese medicine and they aren't interchangeable. Chuan Bei Mu (Sichuan, Fritillaria cirrhosa) is the prized one for dry, lung-deficiency coughs. Zhe Bei Mu (Zhejiang, Fritillaria thunbergii) is its cousin, used for hotter, more acute coughs with phlegm. If you're shopping, ask specifically for Chuan Bei Mu.
Chinese Snow Pear (Xue Li, 雪梨)
A pale, juicy, slightly crisp pear with thin skin and a high water content. If you can't find Chinese snow pear, a regular Asian pear or a ripe nashi works in its place. A standard European pear is the last resort and isn't quite the same, but it's still better than nothing.
In Chinese medicine, pears are cooling and moistening. They support the lungs and clear residual heat from the throat. Eaten cooked, they're easier on a sensitive digestive system than raw pear.
Rock Sugar (Bing Tang, 冰糖)
Crystallised cane sugar in chunks that look like small rocks. Bing Tang is the sweetener used in Chinese medicinal cooking because it's considered gentler on the digestion than white sugar and more "neutral" in temperature. It also tastes lovely against the bitter Chuan Bei Mu.
If you can't find rock sugar, honey or unrefined cane sugar works. Don't use artificial sweeteners or sugar substitutes here. The sweetness is part of the medicine.
How to Make It
Servings: 1 pear, 1 person
Prep: 10 minutes
Steam: 50 minutes
Tools: Steamer (bamboo, metal, or improvised), ceramic or glass bowl that fits in your steamer, paring knife, spoon

Ingredients
- 1 Chinese snow pear (or Asian pear / nashi)
- 12 to 18 Chuan Bei Mu bulbs (about 3 to 5 grams, about 2 teaspoons ground), whole or ground into powder
- 20 grams rock sugar (about 2 tablespoons of small pieces)
Method
- Wash and top the pear. Rinse the pear and pat dry. Slice off the top quarter and set it aside. You're using it as a lid.
- Hollow out the core. With a spoon (a teaspoon works fine), scoop out the seeds and tough core from the inside. Take your time and don't break through the bottom of the pear. You want a clean little bowl shape inside.
- Fill it. Drop the Chuan Bei Mu into the hollow. If you've ground it into powder, sprinkle it in. Add the rock sugar on top.
- Put the lid back on. Place the cut-off top back over the pear to seal it. A toothpick can hold it in place if you're worried about it sliding.
- Place the pear in a heat-safe bowl. A small ceramic or glass bowl, deep enough to catch the juice that will pool around the pear as it steams.
- Steam for 50 minutes. Set up your steamer with water below and the bowl with the pear above. Cover. Steam on medium heat for 50 minutes. Top up the water in the steamer if it gets low.
- Serve warm. Eat the pear with a spoon, and drink every drop of the juice in the bowl. Both are the medicine.
How Often to Take It
For a mild lingering cough, one pear a day for one to three days is usually enough. Most people notice the cough easing after the first or second serving.
For a more stubborn cough, you can do up to two pears a day (morning and evening) for three to five days. Adult dose is up to 6 grams of Chuan Bei Mu per day total. For kids, keep it to 1 to 2 grams per day and use one pear (not two).
If the cough hasn't shifted after five days, or it's getting worse, stop and check in with your GP or practitioner. A cough that won't budge can sometimes mean something else is going on that needs a closer look.
Where to Buy Chuan Bei Mu
Three easy options:
- Your local Asian grocery precinct. Most Asian grocers and Chinese herbal shops stock it. Ask for "Chuan Bei Mu" by name.
- Online. Amazon AU and Etsy AU both have it. Check the listing says Fritillaria cirrhosa (the Sichuan variety) rather than a different Fritillaria.
- Through your Chinese medicine practitioner. If you're already seeing one, ask them. They'll have access to higher-quality stock than most retail.
Frequently Asked Questions
Is Chuan Bei Mu steamed pear safe for children?
Yes, in lower doses. For kids, use about 1 to 2 grams of Chuan Bei Mu per pear (about 4 to 7 bulbs) and offer one pear a day. The remedy is gentle, sweet, and most kids like the taste. As with any herbal remedy, check with your GP first if your child is under 2 or has any chronic conditions.
Can I use a regular pear instead of snow pear?
A nashi or Asian pear is the closest substitute. A European pear (like a Bartlett or Beurre Bosc) will work in a pinch but is more sugary and less cooling. The cooling, moistening quality is part of what makes this remedy effective.
How is this different from honey and lemon?
Honey and lemon is a Western home remedy, also useful for sore throats and mild coughs. Chuan Bei Mu steamed pear is the Chinese version, and it works on a different mechanism in the body. Both are good. They can be used together if you like.
Can I make a bigger batch?
You can steam two or three pears at once if you have the space and a deep enough steamer. Eat them within 24 hours, refrigerated and rewarmed. Don't freeze. The texture goes mushy and the herbs lose potency.
What if my cough is wet, not dry?
Skip this remedy. A wet cough needs warming and drying, not moistening and cooling. For a wet cough, look at ginger, perilla leaf, or congee with warming aromatics. Or come see me and we'll work out what pattern you're in.
When to Get Some Help
If your cough has been going for more than three weeks, you're coughing up blood or coloured phlegm, you have a fever that won't shift, or you're losing weight, don't wait. See your GP. Chinese medicine sits alongside conventional care, not instead of it.
For a lingering dry cough that you've been told is "just post-viral," or you want help working out which pattern you're in, book a consultation and we'll sort it out together.
If you're keen on more remedies like this and you want a deeper understanding of how Chinese medicine actually works (and how to use it day to day), I'm writing a book called Before the Needles. Sign up for early access and you'll get a free chapter when it's ready.
How to Cook Raw Chinese Herbs at Home (Step-by-Step Decoction Guide)
So your practitioner sent you home with a brown paper bag of twigs, bark, roots, and what looks suspiciously like a dried mushroom. You're now wondering what on earth to do with it.
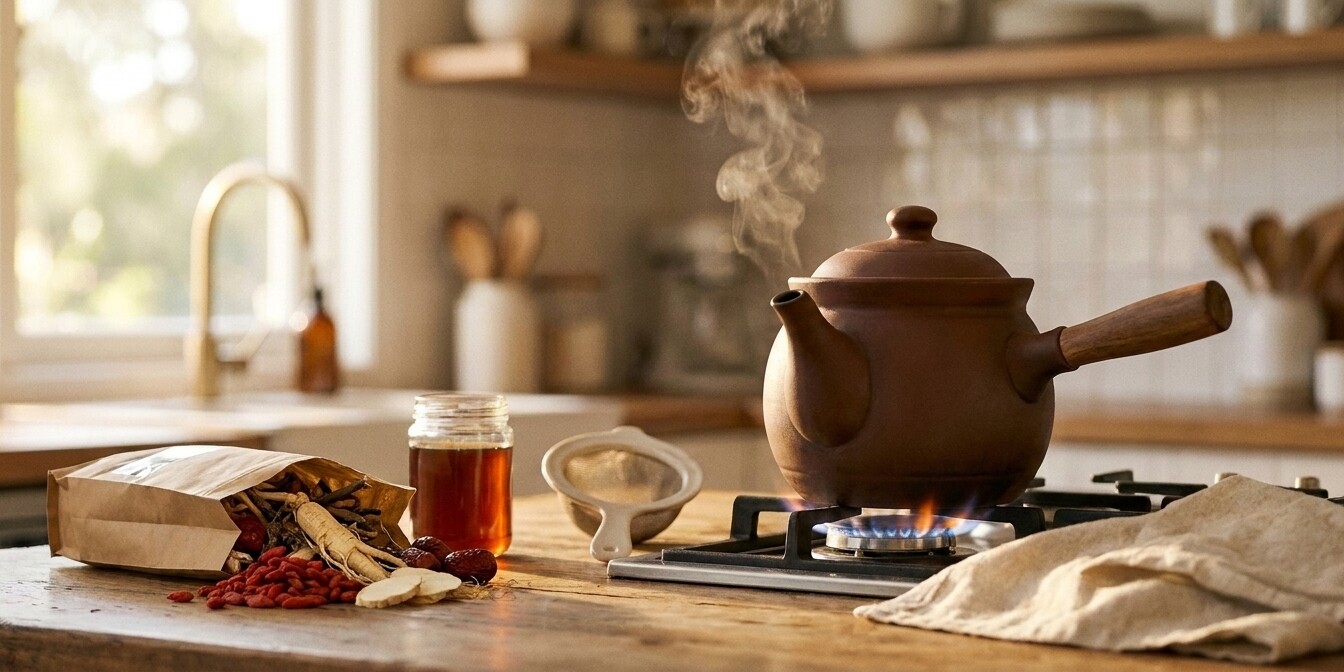
This is your guide to cooking raw Chinese herbs (called a decoction) at home, simply, safely, and without setting off the smoke alarm.
If you're taking pills or granules instead, see Tips for Taking Chinese Herbs for that version.
Quick answer
A Chinese herbal decoction is a strong tea made from raw plant parts. Soak the herbs in 3.5 cups of cool water for 20 to 30 minutes, simmer for 30 to 40 minutes, strain off the liquid, then simmer the same herbs again with 2.5 cups of fresh water. Combine both batches (about 2 cups total). For chronic conditions, divide by 4 and drink morning and evening for 2 days. For acute conditions, divide by 2 and drink morning and evening on the same day.
What is a Chinese Herbal Decoction?
A decoction is just a strong tea made from raw plant parts. You soak, simmer, strain, and drink. The water pulls the active compounds out of the herbs and leaves you with a concentrated brew tailored to your body.
Raw herbs are the original form of Chinese herbal medicine. Stronger than pills, more flexible than granules, and (after the first sip) actually quite manageable.
What You'll Need
- A pot. Glass, ceramic, clay, or stainless steel. Avoid aluminium, copper, cast iron, or anything with a non-stick coating, the metals can react with the herbs.
- Filtered water. Tap water is fine if your area has decent water, but filtered is better.
- A strainer or cheesecloth. Something fine enough to catch small bits.
- A jug or two glass jars. For storing the finished decoction.
- Your bag of herbs. Usually pre-divided into single-day portions.
A dedicated clay herb cooker is traditional and excellent if you take herbs often, but absolutely not required. A regular saucepan is fine.
How Long One Packet Lasts (Read This First)
Most online guides assume one packet equals one day. In my clinic, that's only true for acute conditions, things like fever, sharp pain, or a flare-up that needs full-strength dosing. For most ongoing treatments, the dosing is gentler and a single packet covers two days.
Here's the breakdown:
- Chronic conditions (default): 1 packet = 2 days. Cook once, drink across 4 doses.
- Busy adaptation: 2 packets cooked back to back = 4 days. Same idea, less cooking.
- Acute conditions: 1 packet = 1 day. Stronger, more frequent dosing. Your practitioner will tell you if this applies.
Always follow what your practitioner has prescribed. If you're not sure which version applies to you, ask before you start.
Step-by-Step: How to Cook Raw Herbs
This is the standard method. It works the same whether you're on the chronic or acute schedule, the only difference is how you split the finished decoction.
1. Open one packet
Each packet is one cooking session. Don't combine packets in the same pot, even if you're cooking two days at once.
2. Soak the herbs
Tip the packet into your pot. Add 3.5 cups (about 875ml) of cool water, enough to cover the herbs by 2 to 3cm. If the herbs are bulky and need more water to cover, add a bit more, that's fine. Let them soak for 20 to 30 minutes. This softens the plant material and helps the active compounds release properly. Skipping the soak gives you a weaker brew.
3. First simmer
Bring to a boil with the lid on, then drop to a low simmer for 30 to 40 minutes. Lid stays on, but slightly cracked so steam can escape. Check occasionally that there's still water in the pot.
⏰ Set a timer. Always. The simmer is gentle and quiet, easy to forget. Come back to a dry pot and you've burnt a week's worth of herbs into the bottom of your saucepan. The smoke alarm will let you know.
4. Strain off the first batch
Pour the liquid through your strainer into a jug. Keep the herbs in the pot.
5. Second simmer
Add 2.5 cups (about 625ml) of fresh water to the same herbs. Simmer again for 20 to 30 minutes. Strain into the same jug.
6. Combine and measure
Mix both batches together. You should end up with about 2 cups (500ml) of finished decoction, give or take depending on how much water you started with. Don't worry about the exact volume, just measure the total and divide it.
How to Split Your Decoction
Take whatever total volume you ended up with and divide it by the number of doses needed:
Chronic conditions (default): 1 packet = 2 days
- Divide your total volume by 4.
- Drink one quarter in the morning and one quarter in the evening, for two days.
- If you finished with 2 cups, that's about ½ cup per dose.
Acute conditions: 1 packet = 1 day
- Divide your total volume by 2.
- Drink half in the morning and half in the evening, on the same day.
- If you finished with 2 cups, that's 1 cup per dose.
Stick with whatever your practitioner prescribed. The dosing reflects the strength your body needs.
When to Take Your Decoction
- 30 minutes before food, or 1 hour after, for best absorption.
- Drink it warm, not hot, not cold.
- Morning and evening, ideally about 12 hours apart.
- If your practitioner gave different instructions, follow theirs.
How to Drink It (Without Pulling a Face)
The taste is part of the medicine. Bitter, earthy, occasionally swampy. Some formulas are easier than others.
Things that help:
- Drink it like a small cup of tea, not a shot. Sipping gives your tongue less to react to.
- Hold your nose for the first few sips if needed.
- Chase with a small piece of date or candied ginger. Don't add sugar or honey unless approved, some formulas are less effective with sweeteners.
- Brush your teeth after if the taste lingers.
You'll get used to it within a few days. Most people end up tolerating it fine.
Special Instructions Your Practitioner Might Add
Some herbs need different handling. If your practitioner mentions any of these, follow their lead:
- Decoct first: Certain herbs (like mineral or shell-based herbs) need 20 to 30 minutes of cooking *before* the rest go in.
- Add later: Aromatic herbs (like mint or perilla) lose their potency if cooked too long. Add them in the last 5 to 10 minutes only.
- Wrap in cloth: Some herbs are floaty or fluffy and get wrapped in muslin so they don't end up in your cup.
- Dissolve separately: Things like gelatin (e jiao) get warmed and stirred in at the end.
If your packet has separate small bags inside the main bag, those are usually the special-handling herbs. Ask if you're not sure.
How to Store Your Decoction
- Same day: Keep at room temperature in a covered jar. Drink within 12 hours.
- 1 to 4 days: Refrigerate in glass jars. Warm gently before drinking. Use within 4 days of cooking.
- Don't microwave if you can avoid it. Warm on the stove, in a hot water bath, or in a thermos. Microwave is fine in a pinch.
- Don't reuse the cooked herbs after the second simmer. Compost them.
What to Expect
- The smell will fill your kitchen. Open a window. It fades within an hour.
- Your urine might smell or look different. That's normal.
- Some people feel changes within days, others take weeks. Both are normal.
- If you notice anything unexpected (rash, digestive upset, wired feeling), pause and message your practitioner.
Common Mistakes to Avoid
- Using a metal pot that reacts. Stick to glass, ceramic, clay, or stainless steel.
- Skipping the soak. Big difference in potency.
- Boiling too hard. A gentle simmer extracts the medicine. A rolling boil destroys it.
- Lifting the lid constantly. Lets the volatile compounds escape.
- Drinking it cold. Cold decoctions are harder on digestion and less effective.
- Combining packets to save time. Each packet is a day's dose. Doubling up doesn't double the benefit, it just wastes herbs.
Cooking Two Packets at Once: 4 Days of Herbs in One Session
For single parents and busy professionals, this is the version that actually fits real life. Cook two packets back to back, divide the volume across four days, get on with your week.
How to do it
- Cook two packets back to back on the same evening. Use the standard method (soak, simmer, strain, second simmer, combine) for each packet separately. Don't combine the herbs in one pot, each packet needs its own cooking water and timing.
- Combine both finished batches into one jug. You should end up with around 4 cups (1 litre) total.
- Divide the total by 8 to get your dose. That's about ½ cup per dose, taken morning and evening for 4 days.
- Pre-portion into 8 small glass jars or one labelled jug with marked dose lines. Refrigerate.
- Each day: warm a portion gently, drink within 5 to 10 minutes.
Tips that make this actually work
- Cook on Sundays. One cooking session per week covers Monday through Thursday. Repeat midweek for Friday through Monday, or skip ahead with granules on weekends.
- Cook while you do something else, but SET A TIMER. The simmer is unattended, fold laundry, help with homework, eat dinner. But seriously, set a timer. Forget about it for an hour and you'll come back to a smoky kitchen, a dry pot, and a small pile of very expensive charcoal. Phone alarm labelled "HERBS" is your friend.
- Use small mason jars (200 to 250ml). Pre-portioned doses you can grab from the fridge.
- Warm in a thermos for work. Pour the morning dose into a small thermos before you leave. It stays warm for hours.
What you lose by doing this
About 10 to 20% of the medicinal strength compared to drinking it the same day, mostly from volatile aromatic compounds. For most chronic conditions this is a fair trade for the consistency. For acute presentations (fever, infection, sharp pain), fresh wins, cook daily if you can.
What not to do
- Don't stretch the schedule beyond 4 days. Past that, the decoction loses potency and can spoil.
- Don't freeze unless your practitioner specifically says it's okay for your formula.
- Don't combine the raw herbs from both packets into one giant pot. Each packet cooks separately, then you combine the liquid.
- Don't store in plastic. Glass jars only.
If you're considering this, mention it to your practitioner. They might suggest granules instead, which are designed for exactly this kind of busy life and skip the cooking entirely.
Why Bother With Raw Herbs Instead of Pills?
Raw herbs are the most powerful form of Chinese medicine. They're tailored to your exact pattern, can be adjusted week by week, and the act of preparing them is part of the medicine. You connect with the process.
That said, they're a commitment. If your schedule doesn't allow daily cooking, ask your practitioner about granules or pills as alternatives.
Want Help With Your Formula?
If you've been prescribed raw herbs and you're not sure how to handle yours specifically, or you want to check whether your formula is still the right fit, book a follow-up or message me. The first cook is always the hardest. After that, it's just part of your routine.
If you want a deeper understanding of how Chinese medicine works (and how to get the most out of treatment), I'm writing a book called Before the Needles. Sign up for early access and get a free chapter when it's ready.
Frequently Asked Questions
How long does it take to cook raw Chinese herbs?
Soak for 20 to 30 minutes, then simmer for 30 to 40 minutes for the first batch and 20 to 30 minutes for the second. Total active time is around 90 minutes, but most of that is unattended.
Can I use a slow cooker or Instant Pot?
Yes for an Instant Pot (use the slow cook or sauté/simmer function, not pressure). Slow cookers can work but don't get hot enough on low, use the high setting and check the temperature reaches a true simmer. A regular pot on the stove is still the most reliable.
How long do raw herbs last?
Dry, sealed, in a cool dark place: usually 2 to 3 months. Once cooked, drink within 48 hours and keep refrigerated.
Can I use a microwave to reheat my herbs?
Yes, a quick gentle reheat in the microwave is fine, the stove or a hot water bath is preferred but the microwave won't ruin your formula. Just don't let it come to a rolling boil again once it's been prepared, you're warming it, not re-cooking it.
Can I cook all my packets at once and freeze them?
Freezing isn't recommended, the medicine works best fresh or refrigerated. But cooking 2 packets at once for 4 days of doses is a solid adaptation if you can't cook midweek. See the section above for the method.
Do I have to drink it all in one go?
No. Sip it like tea over 5 to 10 minutes. Splitting into smaller portions across the morning is also fine if your stomach is sensitive.
What if I miss a dose?
Take the next dose at the normal time. Don't double up. Consistency matters more than perfection.
About the author
Eric Higashino is a registered Chinese medicine practitioner (AHPRA) and acupuncturist based in Ballina, NSW, Australia. He treats chronic and complex conditions including Gu Syndrome, mould-related illness, MCAS, POTS and digestive disorders using Chinese herbal medicine, acupuncture and moxibustion. Read more about Eric or book a session.
How to Strengthen Spleen Qi: Diet, Acupressure and Daily Habits
You’ve worked out the pattern. Now what do you actually do about it?
This is the practical companion to What is Spleen Qi Deficiency?: food, acupressure, and daily habits that support a depleted Spleen. No complicated protocols. Just the things that actually move the needle.
What You’re Working With
The goal is simple: stop depleting the soil, and start feeding it what it needs to recover.
The Spleen runs on warmth. It’s burdened by cold, raw food, mental overwork, and irregular eating. Recovery isn’t about adding more. It’s about reducing the load while you rebuild. That’s the thread running through everything below.
Why Stay Away From Cold and Raw Food
Your digestive system has one job: turn everything you eat into something your body can use. In Chinese medicine, that process is described as transformation — and it runs on warmth. Think of your Spleen as a pot over a fire. Whatever goes in has to be cooked down before it can nourish you.
Cold, raw food is the hardest thing for that pot to deal with. An iced drink, a salad, a cold smoothie — your body has to work hard just to bring it up to temperature before digestion can even begin. The further your food is from warm soup, the more digestive fire it takes to process.
When your Spleen Qi is depleted, that fire is already running low. This isn’t a time to make it work harder.

The closer your food is to warm soup — slow-cooked, soft, steaming — the less work your Spleen has to do. Congee. Broth. Roasted root vegetables. These aren’t bland hospital food. They’re the highest-efficiency fuel for a system that’s running on reserve.
- Rice congee (jook): already broken down, easy to absorb, deeply nourishing. The classic Spleen food. Try this easy leftover roast chicken congee recipe for a weeknight version.
- Root vegetables: sweet potato, carrot, pumpkin. Warming, grounding, easy to digest.
- Chicken or bone broth: gentle protein that builds without taxing. This Chinese herbal bone broth recipe adds astragalus and red dates for extra Qi and Blood support.
- Oats: slow, warm, sustaining. Cooked with water, not cold milk.
- Ginger: a few slices in hot water before meals. Wakes up the Spleen’s digestive fire.
Avoid: salads, cold smoothies, raw vegetables, cold drinks with meals — even chilled water. Dairy is heavy and dampening. All of these add to the load.
Eat Gentle Sweet, Not Sugary Sweet

In Chinese medicine, the Spleen has an affinity for sweet flavour. Not refined sugar — the gentle sweetness of root vegetables, grains, and warm cooked food. That kind of sweet nourishes it directly.
Refined sugar and processed fats are a different story. They’re fast fuel — a spike followed by a crash — and in excess they create the exact condition the Spleen struggles most with: Dampness. Heaviness, bloating, brain fog, fatigue that sits in your muscles. That’s Dampness building up because the Spleen can’t transform fast enough.
You don’t need to go sugar-free. You need to swap the sources: sweet potato instead of a muffin, slow oats instead of cereal, a small square of good dark chocolate instead of a handful of lollies. The sweet is still there. The load isn’t.
Timing matters
Eat your biggest meal at lunch. The Spleen is most active between 9am and 1pm. Small, regular, warm meals beat large infrequent ones. Don’t skip breakfast and make up for it at dinner.
Acupressure
You don’t need needles for these. Consistent pressure on the right points adds up over time.
Stomach 36 (Zusanli)

Where: Four finger-widths below the kneecap, just outside the shinbone. Press in and you’ll often feel a slight ache. That’s it.
What it does: The main point for building Qi and Blood from food. Used for fatigue and digestive weakness for centuries.
How: Press firmly with your thumb for 1-2 minutes each leg. Best sitting after a meal or during the afternoon energy dip. Daily use compounds.
Spleen 6 (Sanyinjiao)

Where: Three finger-widths above the inner ankle bone, just behind the shinbone. Often tender.
What it does: Strengthens Spleen, nourishes Blood, helps with the heavy-limb fatigue quality of this pattern.
How: Press firmly for 1 minute each side. Morning or evening. Avoid during pregnancy.
Spleen 3 (Taibai)

Where: Inner edge of the foot, in the hollow just below and behind the ball of the foot.
What it does: Goes straight to the source. Directly tonifies Spleen Qi. Best when digestion is the main issue.
How: Thumb pressure or small circles, 30-60 seconds each foot. Works well in the morning before getting up.
Daily Habits
Sleep and rest
The Spleen’s energy peaks in the morning. Pushing through that window with caffeine and willpower borrows against reserves you don’t have. A 15-20 minute horizontal rest in the late morning makes a real difference. Consistent sleep times matter. Irregular schedules disrupt Spleen rhythm.
Movement
Short gentle walks after meals (10-15 minutes) are genuinely therapeutic. Movement helps the Spleen circulate Qi. Vigorous exercise right now is counterproductive. It depletes what you’re trying to build. Gentle, regular, outdoors if possible.
Warmth
Warmth is medicine for this pattern. Cold environments, air conditioning, cold floors. All of these tax Spleen Yang. Wear an extra layer when you’re tired. A heat pack on the abdomen after meals supports digestion more than most people expect.
One Thing to Start This Week
Swap one cold meal or drink for a warm one. Just one. Hot water instead of cold. Cooked vegetables instead of a salad. That’s it.
It sounds small because it is. But it signals to a depleted system that the load is lightening. Start there.
Women: Cycle Notes
Hormonal shifts directly affect Spleen Qi. The pattern can deepen or ease depending on where you are in your cycle.
- Menstrual phase (days 1-5): Energy at its lowest. Blood loss taxes the system. Rest week. Genuinely. Warm congee, bone broth, no cold food.
- Follicular phase (days 6-13): Energy naturally rises. Use this window gently. Good time to build on the warm-food foundation.
- Ovulation (around day 14): The energetic peak, but it drains fast if Spleen Qi is marginal. Don’t push hard here.
- Luteal phase (days 15-28): Extra rest and warmth. Soups, stews, slow-cooked meals. Reduce demands where you can.
Want to go deeper?
Self-care supports treatment. It doesn’t replace it. If you’ve been managing this on your own and not getting far, that’s usually a sign the pattern needs a closer look.
I’d be glad to help you work out what’s actually going on and build a plan around it.
Tips for Taking Chinese Herbs: How to Make It Easy, Effective, and Part of Your Routine
If you're new to Chinese herbs, you're not alone in wondering things like: "Do I take these with food?" or "How am I supposed to remember three times a day?"
This guide is here to help. Whether you're taking patent pills or granules, there are simple ways to build them into your routine so they actually do what they're meant to, support your healing. And no, you don’t need to be perfect to see results. In Chinese medicine, consistency matters more than perfection. Let’s make this simple and doable.
Quick answer
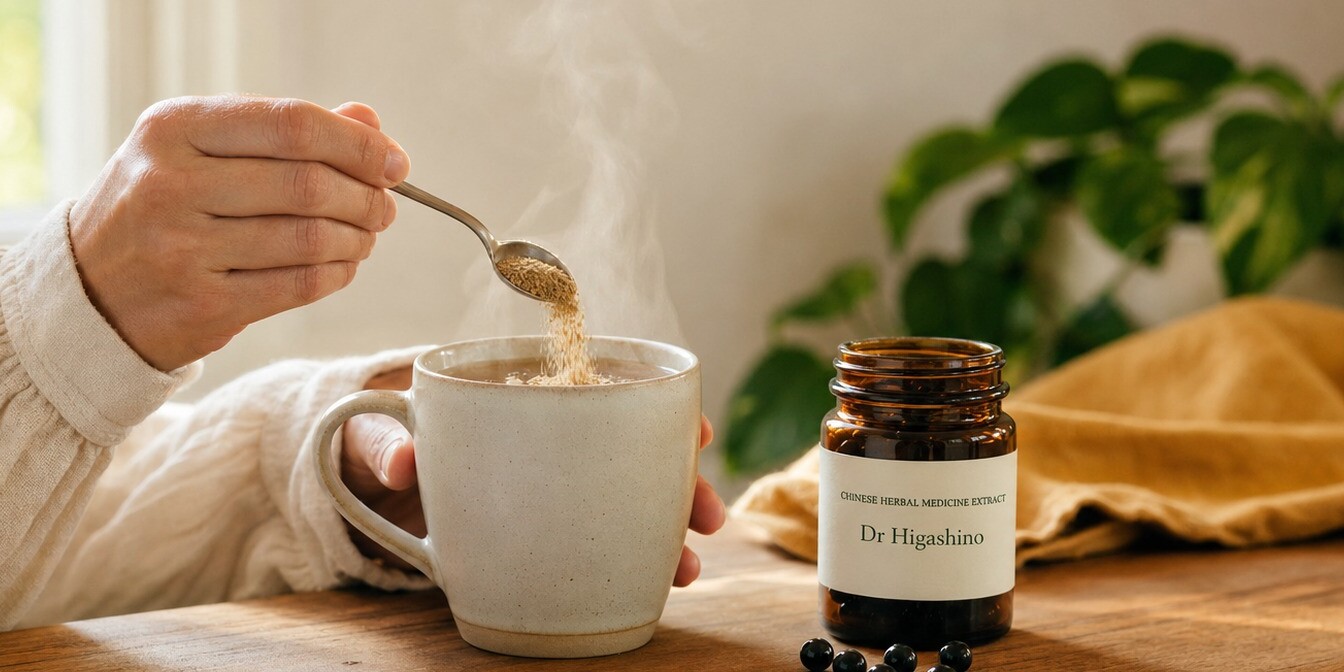
Take your Chinese herbs 30 minutes before food or 1 hour after eating, with warm water. For patent pills, swallow the prescribed number whole. For granules, dissolve 1 teaspoon in 100 to 150ml of warm water and drink like tea. Take consistently, ideally 2 to 3 times a day. Consistency matters more than perfect timing, even imperfect dosing beats skipping.
Where should I get Chinese herbs?
It's best to get your Chinese herbs from a qualified practitioner who can properly diagnose your TCM pattern and match the right formula to your body. Herbal formulas are powerful when used correctly, but not all herbs are suitable for all bodies. You might find herbs online or at health stores, but without a full understanding of the formula, you might not get the results you want, or worse, you could aggravate your symptoms.
If you are prescribed raw herbs (the kind you cook at home), check out my guide on How to Cook Raw Chinese Herbs for extra tips.
What are the main forms of Chinese herbs?
Patent Pills:
- Small, round, easy to swallow.
- Great for travel and busy schedules.
- Best for when your formula stays consistent over time.
Granules:
- Powdered extract form.
- Dissolve easily in warm water
- Easier to adjust dosage depending on how you’re responding.
Taste Tip: Sensitive to tastes? Pills are usually easier. Want a stronger, faster effect? Granules are often more potent.
When should I take my Chinese herbs?
Ideally, take your herbs 30 minutes before meals or 1 hour after eating. This timing helps your body absorb the herbs without the interference of digestion.
BUT: It’s far more important to actually take your herbs consistently, even if the timing isn’t perfect.
If you forget and it’s mealtime? Take them anyway. Your body benefits more from steady support than from occasional "perfect timing."
How can I remember to take my herbs?

- Visual reminders: Leave your herbs next to your toothbrush, kettle, or coffee machine.
- Phone alarms: Set recurring reminders labeled “herbs.”
- Habit stacking: Link it to a habit you already have. Example: "I brush my teeth → I take my herbs."
- Portable options: If you’re using pills, keep a small bottle in your bag or car.
- Weekly organizer: Especially helpful if you have multiple formulas or a busy schedule.
Pro tip: Treat it like brushing your teeth, not dramatic, just part of daily care.
Get early access (and a discount) to Before the Needles. Sign up free →
How do I take Chinese herbs?
Patent Pills:
- Simply swallow the prescribed number of pills with water
- Try to avoid chewing as the taste can be strong
Granules:
- Measure the prescribed dose
- Typically for an adult, 1 teaspoon 3 times a day or 1.5 teaspoons 2 times a day
- Dissolve the granules in about 100-150ml of warm water (about ½ to ⅔ cup)
- Stir until fully dissolved
- Drink it like tea
What if I can't stand the taste of granules?
If the taste of granules feels overwhelming, you're not alone. Here are a few easy tricks to make them more manageable:
- Chase it technique: Instead of mixing it, place the dry powder on your tongue, then quickly wash it down with warm water.
- Dilute more: Use a larger cup of warm water to spread out the flavor.
- Mix with something pleasant: Add a splash of warm apple juice or a little honey after dissolving the herbs.
- Use a straw: Sip the liquid with a straw to bypass most of your taste buds.
- Chase it: Drink the granules quickly, then follow immediately with a sip of tea, water, or juice.
- Temperature matters: Make sure the water is warm but not too hot, as extremely hot water can intensify the bitterness.
Remember: the flavor is part of the medicine, but it's absolutely okay to make it easier on yourself!
What should I expect (taste, texture, timing)?
Granules:
- Earthy, slightly bitter taste is normal.
- Mix with warm water, add a splash of honey or warm apple juice if needed.
- Drink it like tea, not all at once like a shot.
Pills:
- Swallow with water.
- Don’t chew them (trust me on this one).
Timing expectations:
- Some people notice changes quickly; others feel a slow, steady improvement.
- Trust the process. Your body is working with the herbs, not just being "forced" to change.
Why does consistency matter with Chinese herbs?
Chinese medicine is about supporting your body’s natural rhythms. It’s like watering a plant: a little, regularly, is far better than dumping a bucket once a week.
Taking your herbs consistently helps your body gently shift back into balance. This matters even more if you're working through a damp pattern or chronic condition. Skipping doses interrupts that support. Even imperfect dosing, as long as it’s steady, is better than aiming for perfection and doing nothing.
Herbs work on the deep ecosystems of your body. They're not a "band-aid"; they're helping rebuild the soil, not just trimming the weeds.
Want to get the most out of your herbs?
If you have herbs at home and you're not sure how to take them, or your formula is part of treatment for a complex condition like Gu Syndrome, or you want to make sure your current formula is still the best fit, I’m here to help.
Book a follow-up or send me a message. Your body deserves consistent support, and you deserve to feel your best.
About the author
Eric Higashino is a registered Chinese medicine practitioner (AHPRA) and acupuncturist based in Ballina, NSW, Australia. He treats chronic and complex conditions including Gu Syndrome, mould-related illness, MCAS, POTS and digestive disorders using Chinese herbal medicine, acupuncture and moxibustion. Read more about Eric or book a session.
What to read next
How to Use Moxa Sticks at Home: A Step-by-Step Guide
So your acupuncturist told you to try moxa at home and now you’re holding a stick of herbs wondering if you’re about to summon a spirit or start a campfire in your lounge room.
You’re in the right place.
This is your definitive guide to using moxa at home, safely, confidently, and in a way that actually supports your health (without triggering the smoke alarm). Whether you’re dealing with cold feet, cramps, fatigue, or just need some inner warmth, this ancient therapy has your back. Literally.
What is moxa therapy?
Moxa therapy (moxibustion) is a Chinese medicine treatment that uses dried mugwort (Artemisia vulgaris) burned near the skin to warm specific acupuncture points. Practitioners use it to ease cold, fatigue, pain, and period and fertility issues, often alongside acupuncture or as a self-care tool at home.
Types of Moxa
There are many kinds of moxa, but for this guide I will go over the common moxa stick that acupuncturists usually give to patients to use. It can be either regular or smokeless.
The smokeless kind looks like a long charcoal stick that you put in a bbq. The regular looks like a large cigar with dried herbs inside.
The smokeless moxa isn't quite smokeless, but less smokey, so both will have smoke.
Many people say moxa smells like marijuana. Others say it has hints of tobacco, eucalyptus, and sage notes, or a mild, licorice-like scent with hints of green apples. The higher quality Japanese aged moxa has a more pleasant smell and the smokeless has a more muted smell and doesn't have the same aromatics.
Is Moxibustion Safe to Do at Home Without a Practitioner?
Yes, for most people. Moxa sticks are one of the few tools in Chinese medicine specifically designed for home use, and they have a long history of safe self-application. You don't need a practitioner present to use one.
The main safety considerations are straightforward: you should feel warmth, not burning. Keep the stick moving so heat doesn't concentrate on one spot. Have a glass of water nearby to extinguish it safely when done. Don't use moxa over broken skin, on numb areas, or on your face. And if you're pregnant, check with your practitioner first, some points are contraindicated during pregnancy.
Beyond those basics, moxa is forgiving. If you're warming the wrong point, nothing bad happens, you just don't get the benefit. The step-by-step guide below covers technique, timing, and which points to use for common patterns.
How to Use Moxa
First, you are about to light something on fire, so make sure to have plenty of ventilation so you aren't choking on the smoke. Open some windows and have some good air flow or if it's warm enough you can do it outside.
Think of moxa like a giant incense stick on steroids, it's going to have a strong scent and unless you want it to stick around for days get some air flow going.

What to Have Ready
- Moxa Stick (regular or smokeless)
- Extinguishing Tool (jar or salt, sand or rice)
- Lighter (a windproof butane lighter works faster for smokeless moxa)
How to Use the Moxa

-
Light the stick until the entire tip glows red. Smokeless can take a while to have the whole tip glow red
-
Hover it 2 to 3cm above the skin over specific the acupuncture points you were told to warm (don’t touch the skin).
-
Circle or dip the stick slowly, like you’re roasting a marshmallow, but the marshmallow is your Qi.
-
Stop after 5 to 15 minutes, or when the area feels warm and slightly pink.
-
Extinguish in a jar of salt, sand, or rice. (Don’t douse it in water, it’ll ruin the stick.)
Book a session and I'll make a custom moxa plan tailored to your pattern. Book here →
What Points Should I Moxa
Ideally you should have a qualified acupuncturist to diagnose you and guide you on what points would work best for you.
Here are some guidelines for common indications:
Moxa for Fatigue
Feeling like your battery never quite charges to 100%?
Use moxa over your lower back and just below the belly button (DU-4, REN-4, Ren 6). These are the power stations of your body in Chinese medicine, your Qi bank account. See images below for exact points.


- Do it at night, especially when you’re tired but wired.
- Combine with rest, warm food, and low screen time for best results.
You can also strengthen your Spleen Qi with diet and acupressure alongside moxa.
Moxa for Cold Hands, Feet, Belly
If you’re always the cold one in the room, this is your herbal heat lamp.
Use moxa on bottom of the feet, belly, and low back. This warms your Yang, think of it like jump-starting the fire in your internal fireplace. See images below for exact points (KID-1, REN-6, REN-8, DU-4).


If you also feel heavy and foggy, dampness may be combined with yang deficiency.
Moxa for Pain
Moxa loves pain that improves with heat.
If your ache gets better with a hot water bottle or a warming muscle rub, it’ll likely love moxa.
Use it on or around the area of pain (muscle, joints, etc.), keeping it hovering, not touching.
Great for:
-
Lower back pain
-
Menstrual cramps
-
Neck & shoulder tension
-
Cold knees or feet
Bonus: It increases circulation, reduces inflammation, and calms the nervous system.
Moxa for Period Health
Painful, heavy, irregular, or absent periods? Moxa brings balance.
To help warm the womb, regulate blood flow, and ease cramps use moxa on your inner calf, lower belly, and low back (SP-6, REN-4, REN-6, DU-4). Do it in the week leading up to your period. See images below for exact locations.


For best results before treatments, see how to track your cycle for your acupuncturist.
Moxa for Fertility
Moxa is one of the best ways to prepare the body for conception. Think of inviting the baby into a warm belly that would love to spend time there. To start the process moxa the bottom of your foot, lower belly, and just below your knee (KID-1, REN-4, REN-6, ST-36). See images below for exact locations.


- Use 3 to 4 times per week for a few cycles leading up to conception.
- Partners can do it too, for sperm health and vitality.
- Think of it as “warming the soil before planting seeds.”
When Not to Use Moxa
While moxa is gentle and nourishing, it’s not for everyone or every situation. Here’s when to skip the stick (or at least check with your practitioner first):
Don’t Use Moxa If:
- You have a fever, infection, or inflammation
- Moxa adds heat. If your body’s already burning up (like with a flu, UTI, or skin infection), adding more fire can make things worse. If you suspect chronic infection or stealth illness, read about Gu Syndrome and chronic complex illness.
- You’re pregnant (without supervision)
- Some points (like certain abdominal or lower back spots) can be contraindicated during pregnancy.
- However, supervised moxa, like on Bladder 67 for breech babies, is safe and widely used. Just don’t DIY unless your practitioner says it’s okay.
- You have numbness or poor sensation
- If you can’t clearly feel heat, you risk burning yourself. This includes diabetic neuropathy or post-stroke numbness.
- The area has open wounds, rashes, or varicose veins
- Don’t apply moxa over broken skin, inflamed tissue, or bulging veins.
- You have asthma or are sensitive to smoke
- Moxa smoke can irritate the lungs. Use smokeless moxa, or ask for a heat lamp alternative.
- You’re overheated or have signs of excess heat
- Think: red face, dry mouth, night sweats, hot flushes, restlessness. Moxa could make it worse.
- (Let’s cool you down first, then we can talk fire.)
Always Talk to Your Practitioner If:
-
You’re unsure what points to use
-
You’re dealing with a complex or chronic condition
-
You’re pregnant, postpartum, or trying to conceive
Final Tips
-
Ventilate well, It’s smoky, but the scent is part of the healing
-
Never leave a burning stick unattended, Sounds obvious, but you’d be surprised.
-
Pair it with rest and stillness, Let your body integrate the warmth
-
Mark your points, Ask me to show you exactly where to use it
-
Don’t overdo it, 10 minutes per point is enough
Want Personal Guidance?
Not sure where to start or what points are best for you? Book a session or ask during your next treatment, I’ll make a custom moxa plan just for you.
What to read next
How to Track Your Period and Fertility for Your Acupuncturist
- When you start bleeding
- Everyday you are bleeding: amount, clots, color
- Any pain? Where is it?
- Any mood changes?
- Any bloating or digestion issues?
- Does heat, cold, pressure, movement, laying down make your symptoms feel better?
- Basal body temperature
Apps You Can Use to Track Your Period
Flo
Allows to track and view BBT without paying
Flo Homepage - Flo iOS App - Flo Android App
Clue
Is the best app, but is paid to view BBT chart
Clue Homepage - Clue iOS App - Clue Android App
Built in iOS Health Period Tracking
This comes built into all iOS phones and is free to use.
How to Use the iOS Built in Period Tracking
How to Track Your Basal Body Temperature (BBT)
Tracking your Basal Body Temperature (BBT) is a simple and effective way to understand your menstrual cycle and identify ovulation. BBT is your body’s lowest resting temperature, which slightly rises after ovulation due to hormonal changes. By charting this daily, you can recognize patterns in your cycle.
To check your BBT, use a digital basal thermometer (which measures to two decimal places) immediately upon waking up, before any movement or activity. Keep the thermometer by your bedside and take your temperature at the same time each morning, preferably after at least three to four hours of uninterrupted sleep. You may want to discard temperature readings if you haven't three to four hours of sleep as it will throw off the readings.
Place the thermometer under your tongue and wait for the reading.
Once recorded, enter your temperature into a fertility tracking app as mentioned above. Many apps will generate a chart to help you visualize your cycle trends. Consistency is key—by tracking daily, you’ll begin to notice a biphasic pattern: lower temperatures before ovulation and a sustained rise afterward.
For the most accurate insights, combine BBT tracking with other fertility signs like cervical mucus changes.
If you have irregular cycles or need more guidance, consulting a Chinese medicine doctor or healthcare professional that can help you interpret your data effectively.